Step 5 – Single sign-on Remote Desktop Web Access – Standard deployment
4 April 2020The purpose of single sign-on is that my Windows credentials are passed to the web access server and that I won’t have to reconnect to the page.
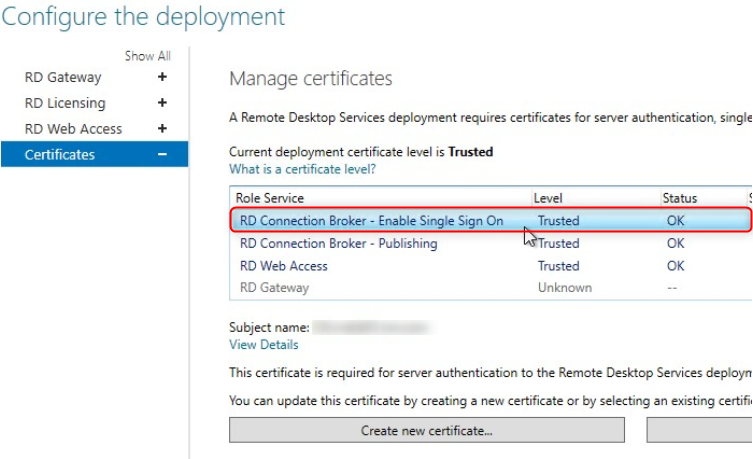
The first thing we will do is request a certificate for the Connection Broker and add it to the list of trusted certificates.
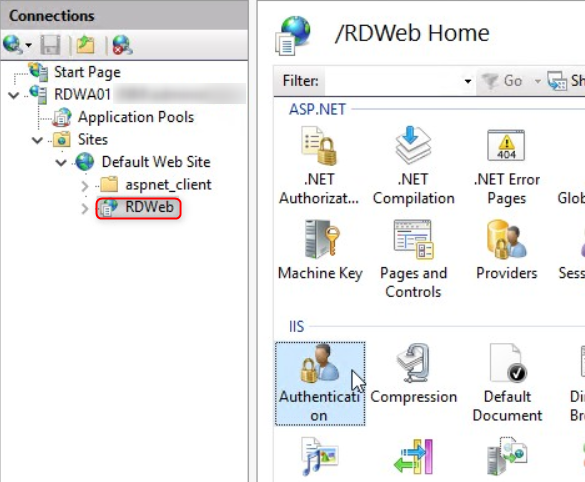
Access the Remote Desktop Web Access Service and configure IIS
RDWeb -> Authentication
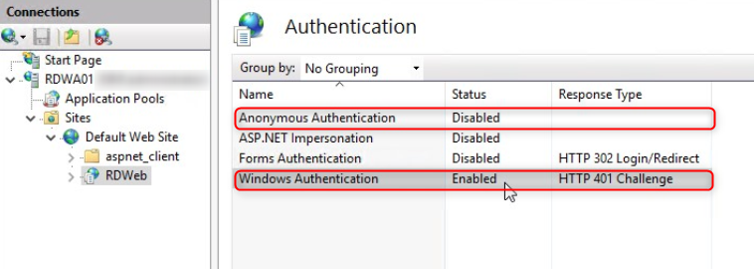
Here we will disable anonymous authentication and enable Windows authentication
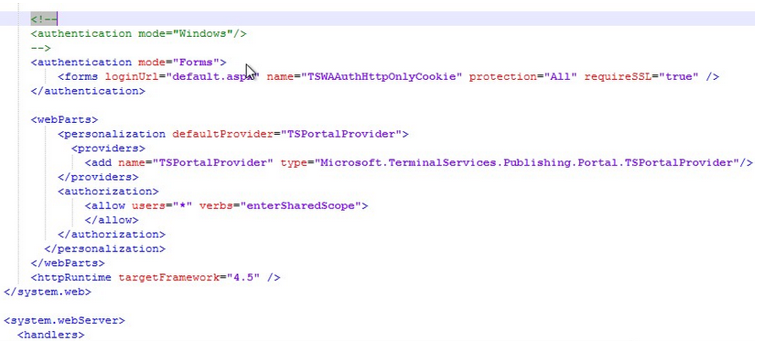
Edit the web.config file found in C:\Windows\Web\RDWeb\Pages
Now if you look, these symbols here (<! -) mean that something is commented out and Windows authentication is commented out, form authentication is active. We want to change that.
We will cut this <! -, and paste it in front of Forms, then I will take the end comment and paste it after the end of the authentication by form ->. There are two other sections that we should also comment on.
It must look like this. Save the file when you are done.
When we access the Web Access page, we are asked to choose whether it is a public or private computer, but since we want single sign-on, we don’t want users to have to make this choice.
We will therefore configure it automatically so that it is listed as a private computer.
Go to C:\Windows\Web\RDWeb\Pages\ <Your-language> and modify Default.aspx
Scroll down and find public and there is a public Boolean that says to display the PublicCheckBox , set to False , but PrivateMode is also False .
We will change this to true so that it is automatically considered a private page and goes through the login page. Save the file when you are done.
The last thing is to configure Group Policy
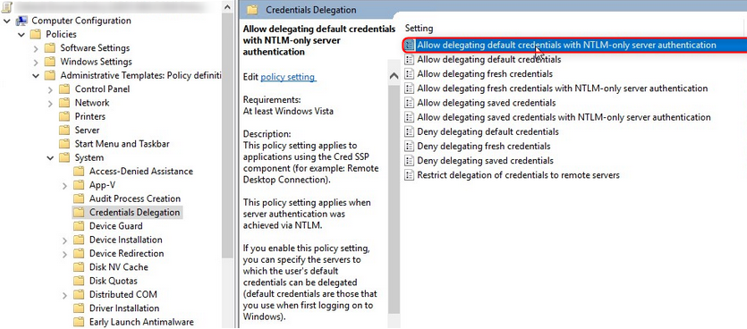
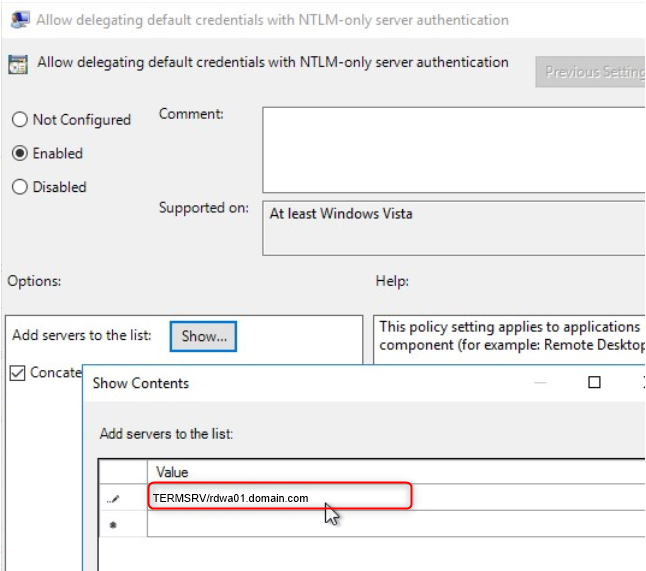
We need to make a number of changes now. First, let’s create a GPO and go to the computer side in Policies, Administrative Templates, System and change the delegation of credentials. “Allow delegation of default credentials with NTLM server authentication only”
We will open it, and activate the policy, we must in the Value tab put ” TERMSRV/ ” followed by the fully qualified domain name of the Web Access server.
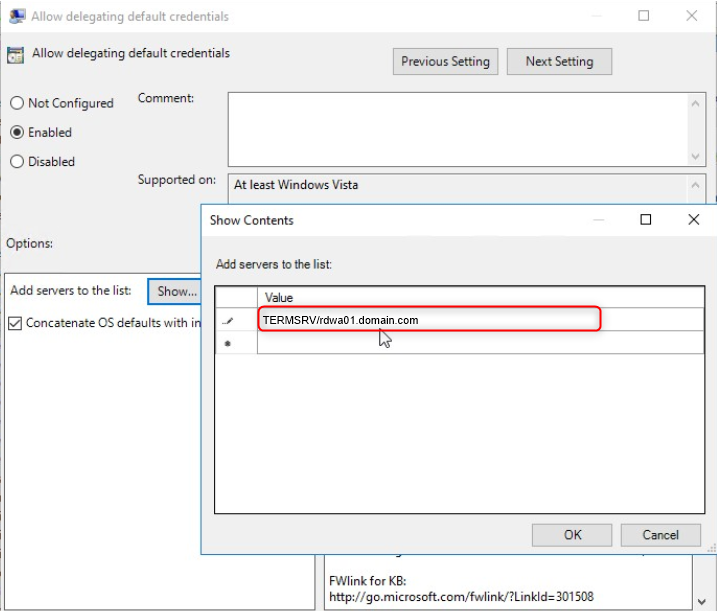
We will do the same to allow delegation of default credentials. Activate it, display the servers and add the same as the value.
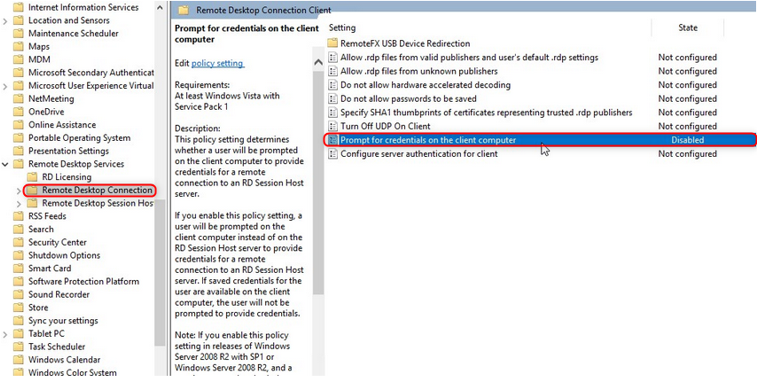
The step is to go to Windows components and find the Remote Desktop. Under Remote Desktop Services, we will open the connection client and where it says Request credentials on the client computer, and disable it.
“In single sign-on, we don’t want to ask for credentials.“
Now the last thing is to allow Internet Explorer to deliver the credentials. We will make the changes on the computer and user side to avoid any problems
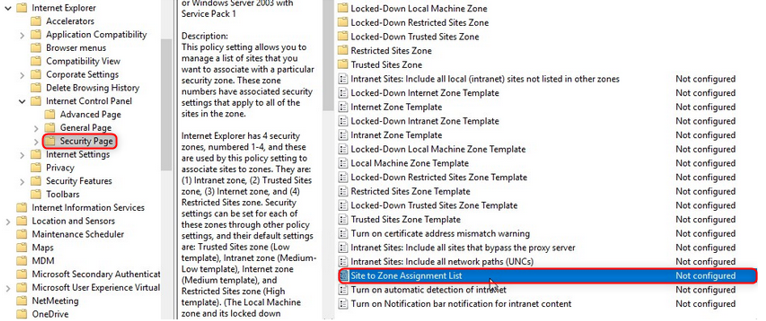
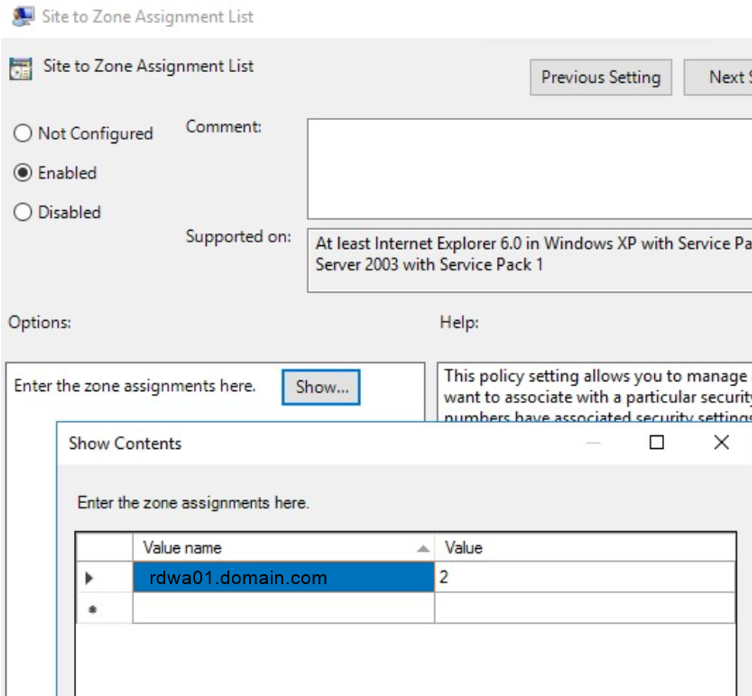
Internet Explorer -> Internet Control Panel and click on the security pages, and the first thing we are going to do is modify the site assignment list to the zone. Only sites assigned to the trusted sites zone are allowed to use Integrated Windows authentication.
We now go to the Trusted sites area and click on Logon Options and activate the policy.
Do the same for the user side and restart the RD Web server.
Now, if you start your web browser and go to the RD Web Access web page, you will be able to access it directly.
Visits: 1013

